Facebook ads are an important part of many companies’ digital marketing strategies.
Whether the goal is to build awareness or generate sales and revenue, measuring and reporting campaign effectiveness can be challenging.
You may be wondering, are my Facebook ads working? Or should I invest my marketing budget elsewhere?
The Facebook Ads platform allows you to generate reports with data that is segmented and cubed in many different ways, providing great insights into ad performance.
However, Facebook Ads reports can be overwhelming and confusing.
Even a simple dashboard can help you level up and take your reporting to a new level.
In this column, you’ll learn how to do this using Google Data Studio’s Facebook Ad Performance Reporting dashboard.
Why do you need a Facebook Ads Dashboard
There is no shortage of reporting solutions, but Google Data Studio, in our opinion, tops the list.
It’s easy to use, fast, and most importantly, free.
There are also many additional benefits, starting with the ability to import data locally from Google Analytics.
This means that you can measure the effectiveness of your Facebook campaigns and compare their performance to that of other channels.
In addition, the dashboard allows you to easily manipulate the data and present it in multiple reports or charts.
but that is not all. From a user perspective, managing dashboards is much easier than managing reports when datasets and/or date ranges are analyzed and compared.
How to get started with Google Data Studio and Facebook Ads
While Google Data Studio is a great tool in a digital marketer’s arsenal, integrating Facebook Ads data requires a few extra steps compared to Google’s native platforms like Google Ads, Google Analytics, etc.
do not worry. Countless manual and automated solutions allow you to import data from Facebook Ads into Data Studio.
Whichever you choose, you should still be able to achieve a beautiful and valuable dashboard for you and your business.
Manually import data
Let’s start by manually importing the data.
1. Export the data
The easiest way to do this is to create a downloadable Facebook Ads report.
Be aware that if you want to measure the success of your ads by platform (eg Facebook, Instagram, etc.) and/or placement (Instagram Stories, Feed, Right Hand Column, etc.) you won’t be able to see metrics like purchases or conversion value purchases or purchase cost.
This level of data is not available on the (Facebook Ads) platform, so it is also not accessible through the data regardless of how it is pulled, whether via an API, a connector, or manually downloaded as in our case.
Conversion data is only available at the top level.
If you want to see how your ads are performing and measure ROI (return on investment) or return on ad spend (return on ad spend), you’ll need to download data broken down by campaign, ad group, and/or time – only.
You can still create and download an additional report that breaks down the data by delivery and, accordingly, platform and placement.
However, this will only show you performance metrics like impressions, reach, clicks, CPC (cost per click), CPM (cost per thousand impressions), etc.
There remains a great case for using this data to evaluate and understand the performance of our ads across each platform and placement, and using those lessons to improve campaign delivery.
Step 1: head to Advertising reports and create a new report.
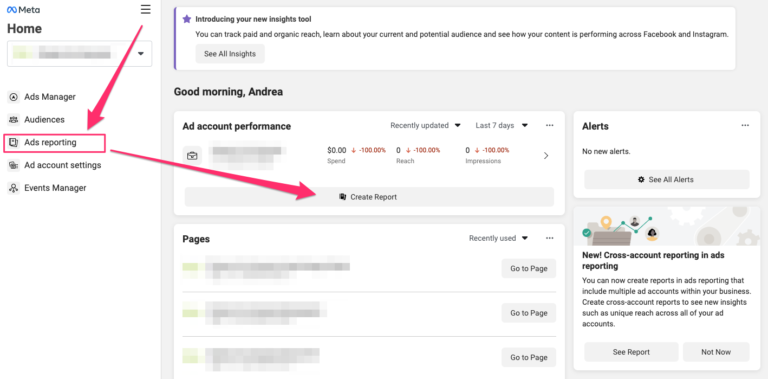
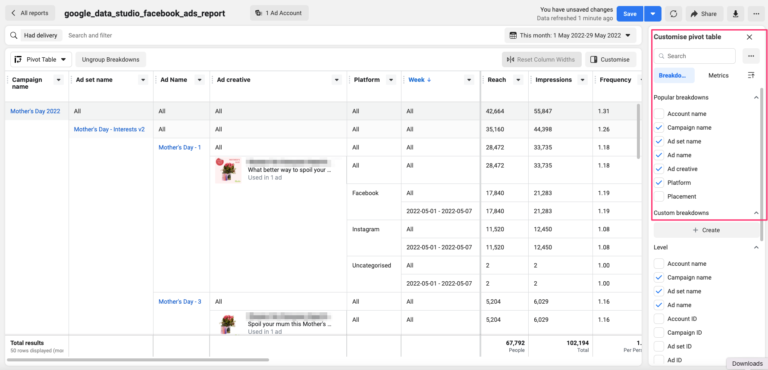
Step 2: Choose metrics and dimensions for your report.
 Screenshot from Facebook Ads Manager, June 2022
Here, it is important to keep in mind the end result and the data you will need for the dashboard.
Step 3: schedule the report.
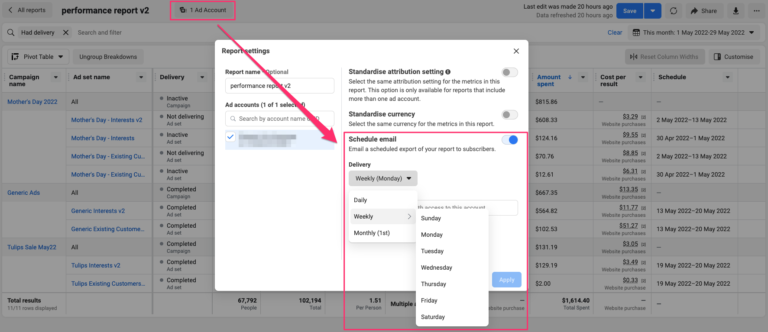 Screenshot from Facebook Ads Manager, June 2022
This is optional, but sending the reports to your inbox instead of downloading them each time will make your life so much easier!
Step 4: May need data processing.
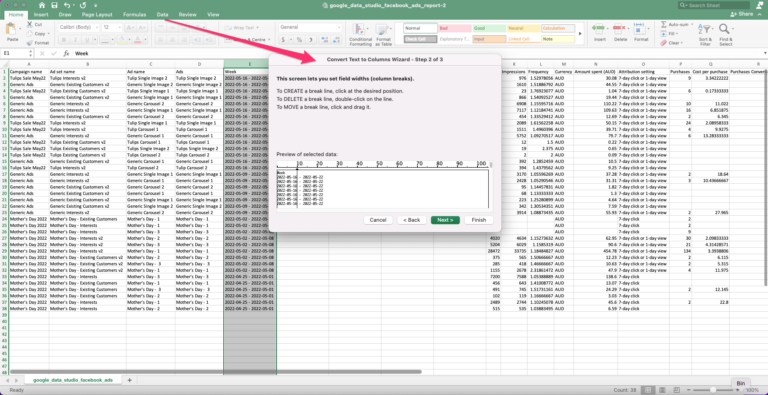 Screenshot from the author, June 2022
Alignment of data downloaded from Facebook ads may require some small changes.
In the example above, we changed the date column to ensure that Google Data Studio will recognize it.
2. Import the data
Once you download the data in CSV or Excel format, you can import it into Google Sheets.
Fifth step: From Excel to Google Sheets.
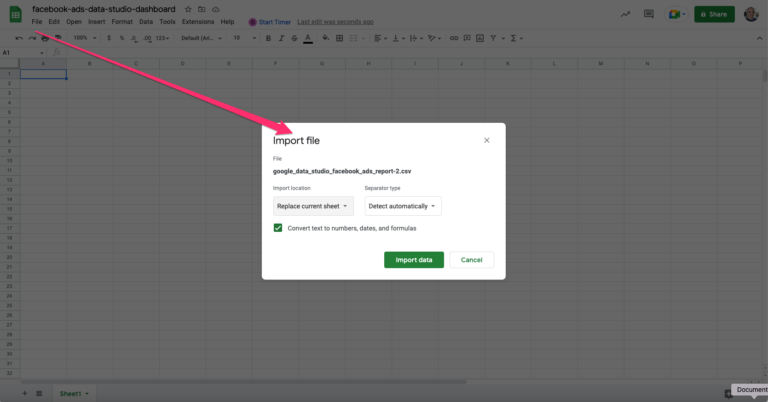 Screenshot from Google Sheets, June 2022
If you schedule the report to be emailed regularly, be it daily, weekly or monthly, you can automate some of the above steps.
Solutions like Zapier allow you to set up automatic imports of data from an email attachment directly into Google Sheets.
Since this may vary from setup to setup, we will not cover this process in this guide. However, a quick Google search should help.
After importing the data, connect the sheet to Data Studio as a data source.
Step 6: add data.
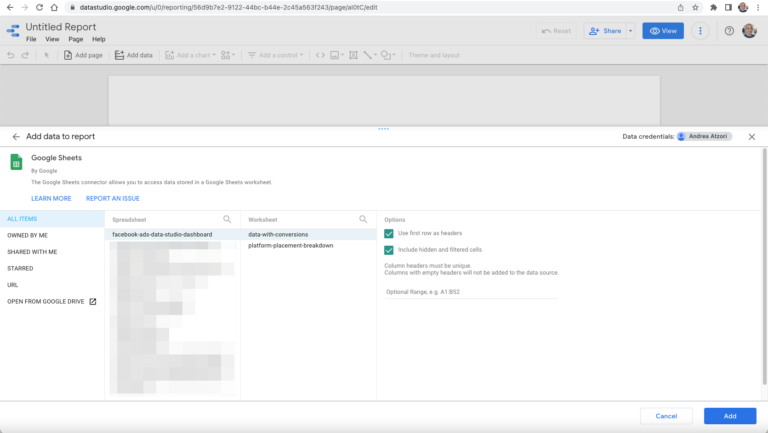 Screenshot from Google Data Studio, June 2022
You will only need to connect your Google Spreadsheet to your Data Studio Dashboard once.
Once connected, any changes to the data in the sheet will be reflected in the dashboard.
When adding data to Data Studio from a CSV file or Google Sheets, note a few really important things.
Handle metrics like reach, frequency, and computed metrics like CPC, CPM, etc., carefully when merging and aggregating data.
More on that in a few minutes. In the meantime, we can start designing and building our dashboard.
Dashboard design and build
Step 7: Start adding some design elements and features.
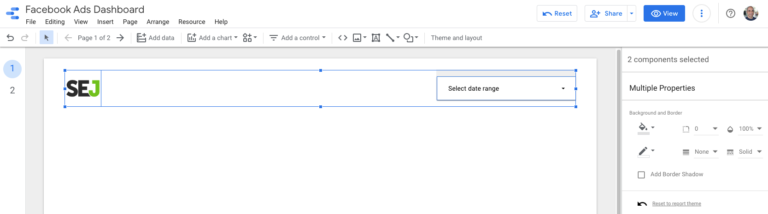 Screenshot from Google Data Studio, June 2022
We added a logo and scope to control the date range in our example and made it “report-wide”.
This means that these items will be copied across all of our dashboard pages, which can be very handy!
From now on, the options are endless.
Step 8: Change the layout, add data with scorecards and tables, visualize it with charts, and more.
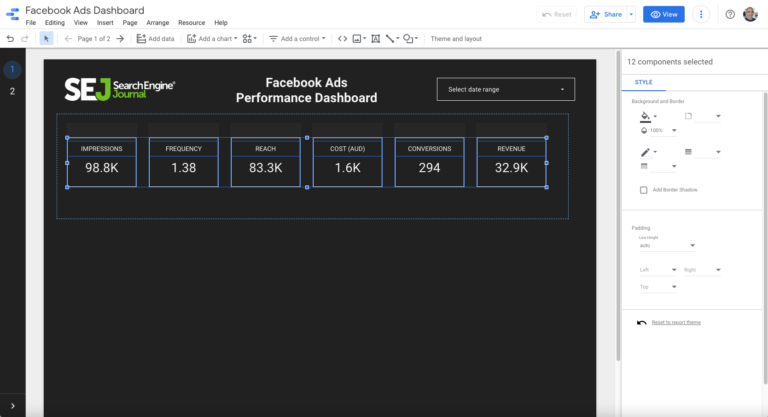 Screenshot from Google Data Studio, June 2022
We started with a few scorecards to show outstanding performance and KPIs in our example.
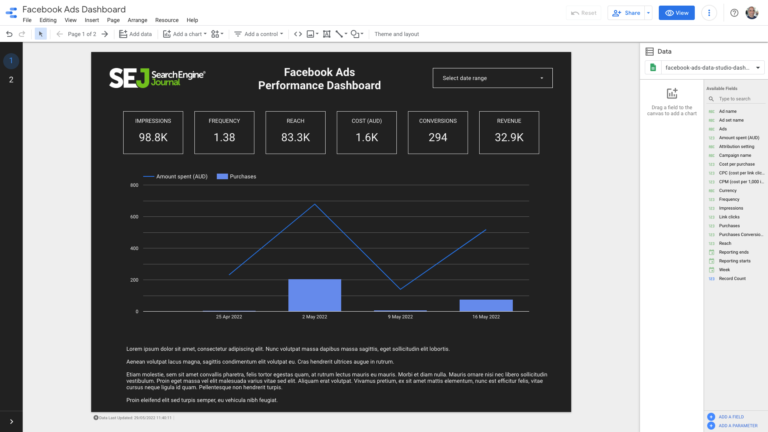 Screenshot from Google Data Studio, June 2022
You can also add free text to include comments, insights, and recommendations.
Step 9: Add additional features to the control panel.
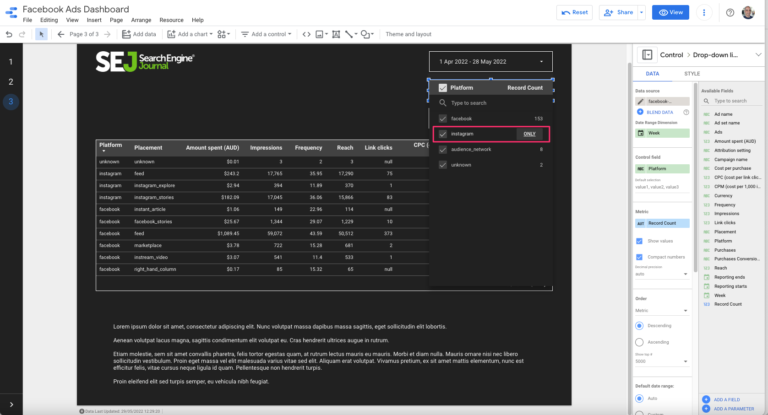 Screenshot from Google Data Studio, June 2022
Now you can customize your pages and how you access the data with filters, slices, sliders, drop-down lists, and more.
Returning to our example, the screenshot above shows how using dropdown menus makes it possible to zoom in on subsets of data.
Here, we can choose to divide it by platform (such as Instagram, Facebook, etc.).
Rinse and repeat
There you have it – the basic steps to creating a Data Studio dashboard for your Facebook ads.
It’s that easy.
You can add new data sources, bring additional datasets into the report, and create more detailed and advanced reports within the dashboards.
Metrics such as reach and frequency
As mentioned above, some metrics need to be carefully managed.
For example, if we have a report with ad frequency broken down by week, the sum or average of those values will not give you the exact number as it would be reported on the Facebook ad platform or reports.
I suggest downloading and adding the data for the period you wish to report and adding it as a separate page (or tab if it is included in the current report).
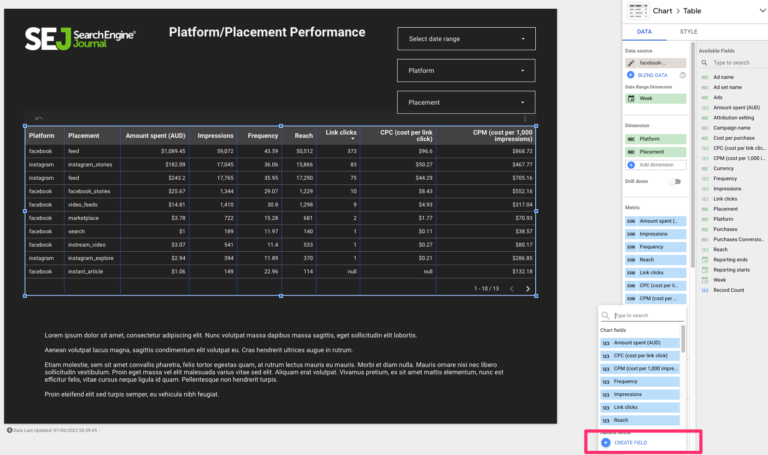
Calculated metrics
For values like Average CTR, CPC, CPM, or even ROI (Return on Investment) and Return on Ad Spend, I would suggest adding these values as calculated metrics in Data Studio.
Doing so is simple.
In Metrics, select add scaleAnd Create a fieldAnd there you can build your values.
Note that this is not just about these simple metrics, but you can also create and add your own.
 Screenshot from Google Data Studio, June 2022
For example, you can add values like gross profit margin or other financial metrics that allow you to better understand how your business is doing in relation to Facebook ads, right from within your dashboard!
Connectors and automation
It’s quick and easy to create an integrated solution based on manually downloading data or setting up a workflow using tools like Zapier.
However, there are also more advanced options.
These are particularly useful for large-scale agencies and companies that need to minimize manual tasks and prefer full automation for reliability (i.e. less margin of error) and speed, especially when working with large data sets.
For this purpose, our company uses dataslayer (although there are others, too), a reporting tool that provides a powerful, easy-to-use Google Sheets connector.
The benefit is that you can create queries and save them to your spreadsheet using the connector, and once set, you can automatically pull in data and update it regularly.
So, for example, we can set the query to download data every Monday for the previous 7 days, and so the Data Studio dashboard is automatically refreshed and refreshed every week – without having to lift a finger.
Final considerations
As we’ve seen, creating a useful dashboard takes a little planning and setup work.
But the beauty of it is that dashboards (as a collection of reports and graphs) are very powerful and flexible in nature.
Don’t be afraid to start with a simple version and go on to create multiple iterations of it with different views, tables, charts, and more.
The time and effort invested will be more than worth it!
More resources:
- New Google Blog Series about Search Console and Data Studio
- How to open better segments in Google Data Studio with “CASE”
- How to Advertise on Facebook: A Beginner’s Guide
Featured image: Griboedov/Shutterstock